The Hisense U7K is one of the company’s latest 4K LED TVs featuring premium picture quality technology like full-array local dimming and quantum dot color. While the U7K delivers impressive picture performance out of the box, fine-tuning some settings can help you get the most accurate and optimized picture for different types of content. Here are some recommended picture settings for the Hisense U7K for the best picture quality.
Best Picture Quality Settings of Hisense U7K
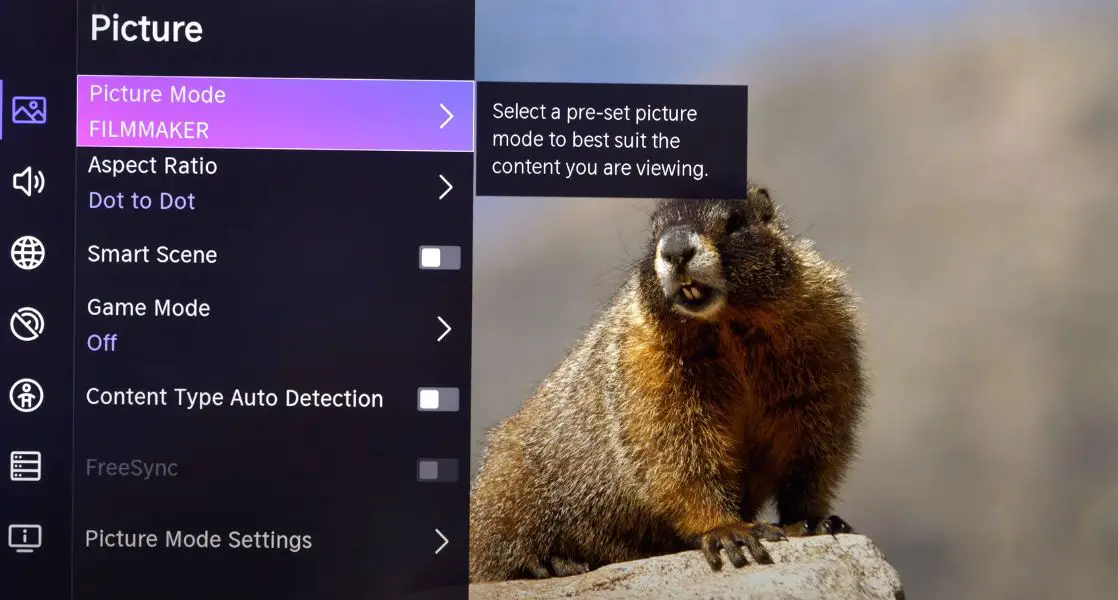
Picture Mode
The U7K comes with several preset picture modes tailored for different content types. The best-preset picture mode for most content is Filmmaker Mode. This will provide the most accurate colors and pictures closest to what the director intended. Filmmaker Mode disables most post-processing effects that may artificially enhance or alter the picture.
For HDR content, switch to HDR Theater or HDR Standard mode. This enables the TV’s full high dynamic range capability to display the enhanced contrast and expanded brightness range.
For gaming, use Game Mode to get ultra-low input lag. This disables processing that could add display delay.
Visit here for more details: Filmmaker and HDR Mode
Note that you can further customize settings within each picture mode as outlined below. But starting with the right preset picture mode gets you closest to an optimal baseline.
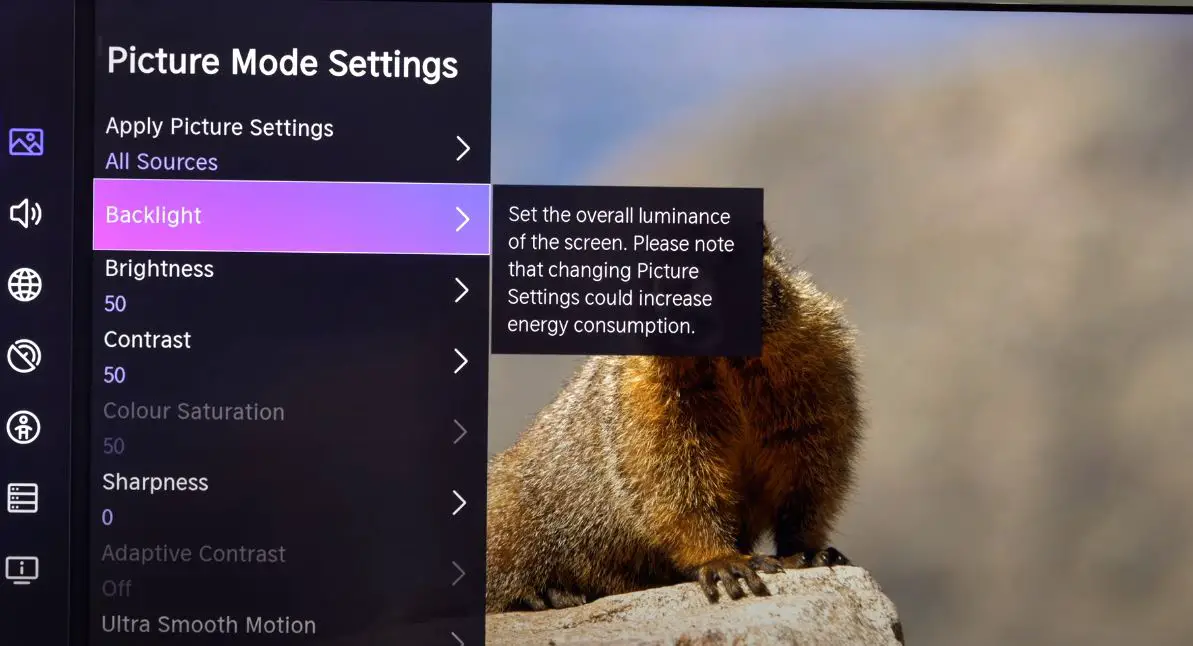
Backlight/OLED Light Setting
- For SDR content, set the Backlight setting to maximum or near maximum, around 90-100. This allows the TV to deliver its full luminance capability for regular standard dynamic range video.
- You can make the most impactful adjustment for HDR by setting the backlight to max out around 1000 nits of peak brightness on small highlights. This matches the TV’s specifications and allows bright highlights in HDR content to shine.
Contrast Setting
- The Contrast setting controls the white level and peak brightness.
- For the most accurate contrast, set Contrast to 90-95 for both SDR and HDR content.
- Setting the contrast too high will lead to clipped whites, which crushes detail.
Brightness Setting
- Brightness adjusts black levels and shadow details.
- Set Brightness to around 50 for both SDR and HDR content for ideal black levels.
- Setting it too high will wash out blacks, while too low will crush shadow details.
Color Setting
- The Color setting adjusts the intensity of overall colors.
- For SDR content, a good value is around 50-55, depending on room lighting levels.
- For HDR, you can increase up to around 60-65 to get more saturated colors.
Tint Setting
- The tint adjusts the balance between green and red hues.
- Leave Tint at the default middle 0 setting to maintain accurate color balance. Adjust only if skin tones appear off.
Sharpness Setting
- Sharpness increases the definition of edges and details.
- Avoid pushing sharpness too high, as it can add edge halos and noise.
- For HD/Full HD SDR, around 20-30 is good. For 4K SDR or HDR, 10-15 is ideal. Higher resolution can tolerate less sharpness.
Color Temperature Setting
- Color Temperature adjusts the overall color balance from warm to cool. The most accurate and neutral is the custom color temperature mode, which should be closest to the industry’s 6500K standard for white balance.
- If skin tones appear reddish, try the Cooler preset values like Normal. If skin tones look green/pale, try a Warmer temperature preset like Warm.
Advanced Picture Settings
Under Advanced Settings, there are a few additional settings to adjust for further fine-tuning:

Local Contrast Control: This adjusts the local dimming intensity. Higher values will increase contrast but clip blacks and shadows. For SDR, Medium is a good balance. For HDR, you can increase it to High.
Noise Reduction: Adjusting Noise Reduction higher will reduce film grain and video noise but can smooth out details. For streaming or poor-quality sources, Medium may help. For high-quality Blu-rays and 4K, turn this Off or Low.
Black Level: Sets black level balance. Leave it on auto or adjust it to low for better shadow delineation.
Gamma: Affects mid-range brightness balance. 2.2 is the ideal gamma for accurate reproduction. 2.4 will boost mid-tones, while 2.0 will make mid-tones darker.
Color Gamut: Switch between Auto, Native, or other wider gamut options depending on content source Gamut levels. Auto is suitable for most content.
These optimal picture settings will allow you to get the most accurate picture from the Hisense U7K for various content types. Note that you may need to adjust further based on room lighting conditions and personal preference. Adjusting during darker and brighter scenes will help tune into your lighting environment. Calibration with test patterns and meters can achieve absolute accuracy if needed. But these settings provide an excellent starting point to experience the U7K’s winning contrast, color, and 4K picture performance. Let us know if you have any other U7K picture-setting tips!